


有丢失数据的风险,操作前请务必做好快照或备份。
情景再现:
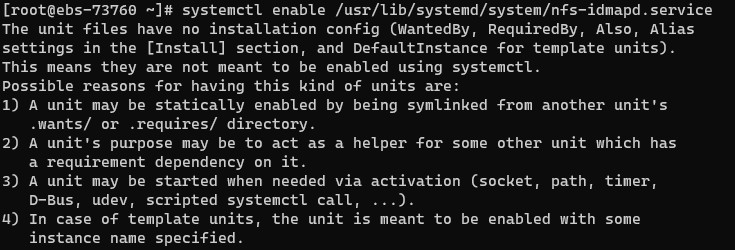
删除分区后磁盘挂载报错:
或[[email protected] mnt]# mount /dev/vdb1 /mnt
mount: /dev/vdb1 is already mounted or /mnt busy
/dev/vdb1 is already mounted on /mnt
注意:报上面错误不一定都是删除了磁盘分区的原因,具体需根据情况操作,如果您对数据盘分区做过调整,刚好也报上面的错误,则可能是磁盘分区的原因。[[email protected]~]# mount /dev/vdb1 /mnt
mount: special device /dev/vdb1 does not exist
操作前请务必做好快照或备份。
解决方法:
1、安装testdisk。
centos系统:
乌班图:yum -y install testdisk
2、运行testfdisk恢复分区(将/dev/vdb更换为您自己的磁盘分区)sudo apt-get install testdisk sudo apt-get install testdisk
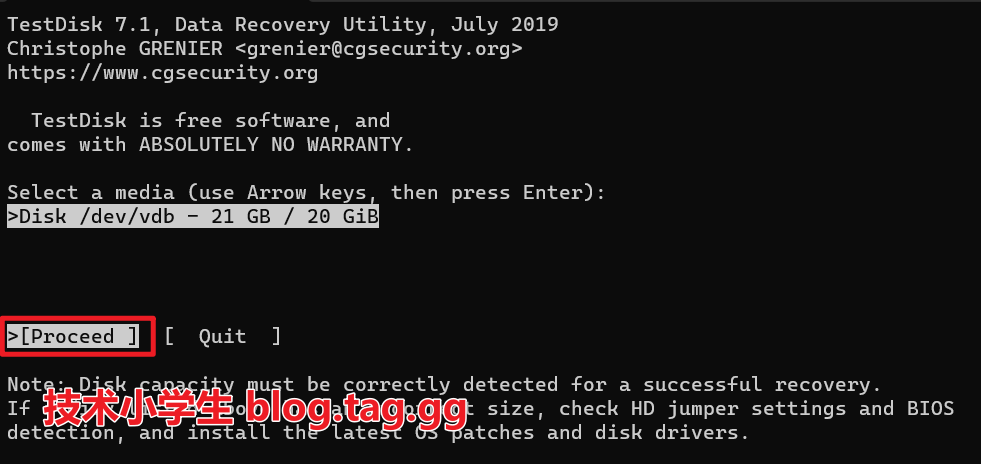
显示如下:testdisk /dev/vdb
如图TestDisk 7.1, Data Recovery Utility, July 2019
Christophe GRENIER <[email protected]>
https://www.cgsecurity.org
TestDisk is free software, and
comes with ABSOLUTELY NO WARRANTY.
Select a media (use Arrow keys, then press Enter):
>Disk /dev/vdb - 21 GB / 20 GiB
>[Proceed ] [ Quit ]
Note: Disk capacity must be correctly detected for a successful recovery.
If a disk listed above has an incorrect size, check HD jumper settings and BIOS
detection, and install the latest OS patches and disk drivers.
TestDisk 7.1, Data Recovery Utility, July 2019
Christophe GRENIER <[email protected]>
https://www.cgsecurity.org
Disk /dev/vdb - 21 GB / 20 GiB
Please select the partition table type, press Enter when done.Hint: Intel partition table type has been detected.Note: D
>[Intel ] Intel/PC partition 说明:磁盘分区是mbr则选这个。
[EFI GPT] EFI GPT partition map (Mac i386, some x86_64...) 说明:磁盘分区是gpt则选这个。
[Humax ] Humax partition table
[Mac ] Apple partition map (legacy)
[None ] Non partitioned media
[Sun ] Sun Solaris partition
[XBox ] XBox partition
[Return ] Return to disk selection

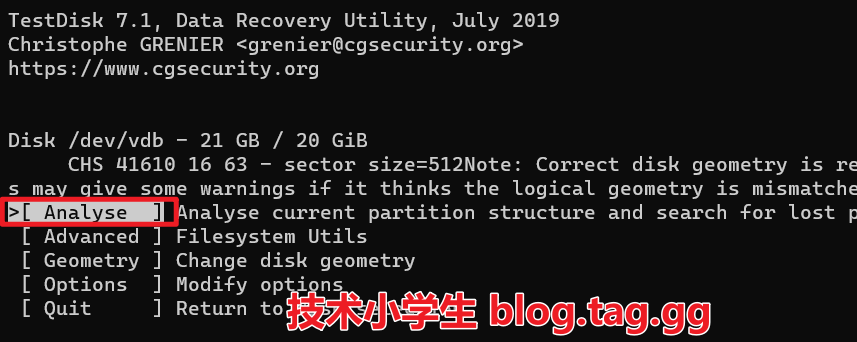
我的磁盘分区是GPT,所以我选择第二个,上下键选择后按回车出现如下:
TestDisk 7.1, Data Recovery Utility, July 2019
Christophe GRENIER <[email protected]>
https://www.cgsecurity.org
Disk /dev/vdb - 21 GB / 20 GiB
CHS 41610 16 63 - sector size=512Note: Correct disk geometry is required for a successful recovery. 'Analyse'process may give some warnings if it thinks the logical geometry is mismatched.
>[ Analyse ] Analyse current partition structure and search for lost partitions
[ Advanced ] Filesystem Utils
[ Geometry ] Change disk geometry
[ Options ] Modify options
[ Quit ] Return to disk selection
TestDisk 7.1, Data Recovery Utility, July 2019
Christophe GRENIER <[email protected]>
https://www.cgsecurity.org
Disk /dev/vdb - 21 GB / 20 GiB - CHS 41610 16 63
Current partition structure:
Partition Start End Size in sectors
Trying alternate GPT
P=Primary D=Deleted
>[Quick Search]
Try to locate partition
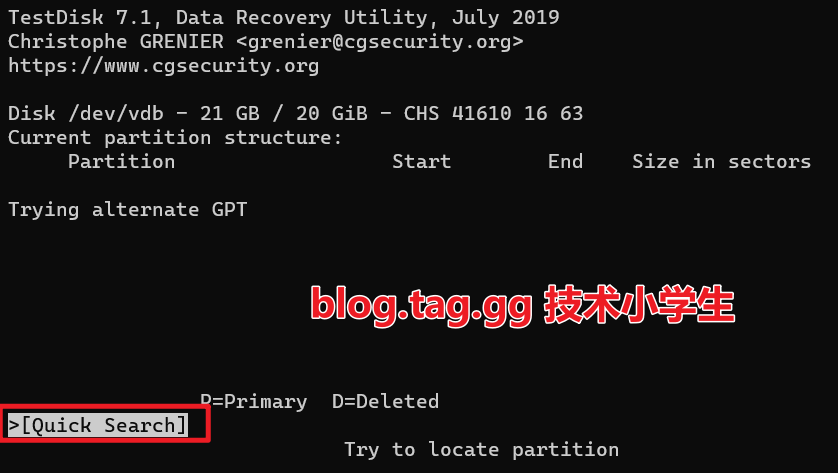
搜索后稍等片刻会显示如下信息,具体等待时间长短与您磁盘容量有关系。
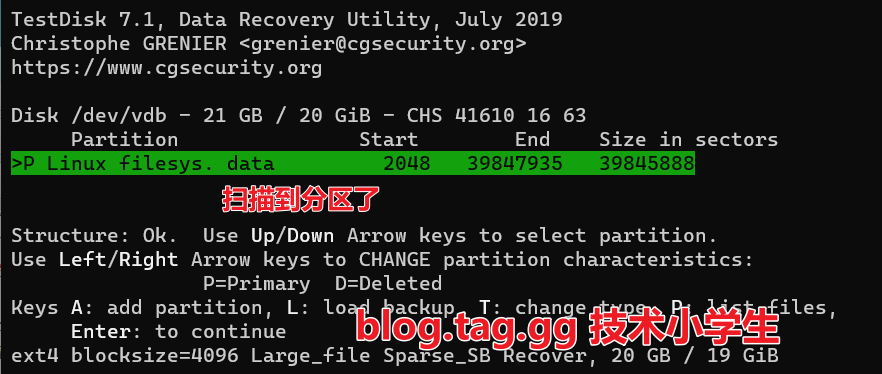
TestDisk 7.1, Data Recovery Utility, July 2019
Christophe GRENIER <[email protected]>
https://www.cgsecurity.org
Disk /dev/vdb - 21 GB / 20 GiB - CHS 41610 16 63
Partition Start End Size in sectors
>P Linux filesys. data 2048 39847935 39845888
Structure: Ok. Use Up/Down Arrow keys to select partition.
Use Left/Right Arrow keys to CHANGE partition characteristics:
P=Primary D=Deleted
Keys A: add partition, L: load backup, T: change type, P: list files,
Enter: to continue
ext4 blocksize=4096 Large_file Sparse_SB Recover, 20 GB / 19 GiB
TestDisk 7.1, Data Recovery Utility, July 2019
Christophe GRENIER <[email protected]>
https://www.cgsecurity.org
Disk /dev/vdb - 21 GB / 20 GiB - CHS 41610 16 63
Partition Start End Size in sectors
1 P Linux filesys. data 2048 39847935 39845888
[ Quit ] [ Return ] [Deeper Search] >[ Write ]
Write partition structure to disk
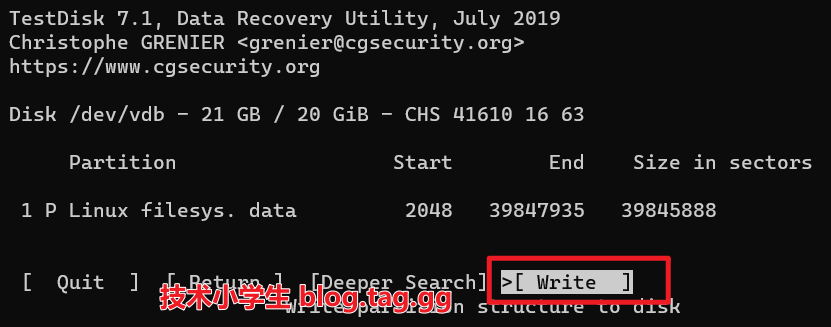
如果提示:“You will have to reboot for the change to take effect.”则需要重启服务器后执行如下命令。TestDisk 7.1, Data Recovery Utility, July 2019
Christophe GRENIER <[email protected]>
https://www.cgsecurity.org
Write partition table, confirm ? (Y/N)y
退出testfdisk(ctrl+c)然后执行如下命令,如果没任提示,则表示正常。
此时再执行 挂在命令正常了,进入/mnt目录看数据还在,谢天谢地。partprobe /dev/vdb


文章评论 本文章有个评论